Learn how to get started with TanvasTouch products.
Step 1: Unpack
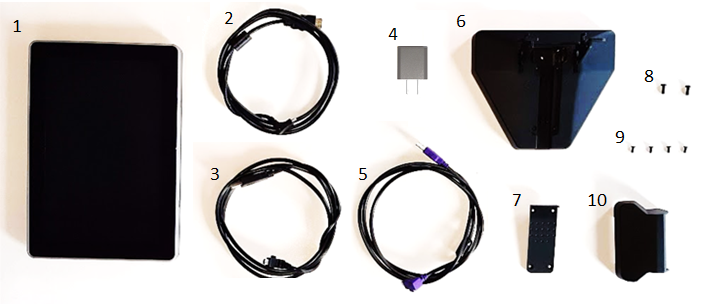
The box contains:
- Screen with TanvasTouch
- HDMI cable
- USB data cable (Purple)
- DC 5V Power supply
- USB power cable (Black)
- Stand base
- Cable cover
- Large Screws (2)
- Small Screws (4)
- Back cover
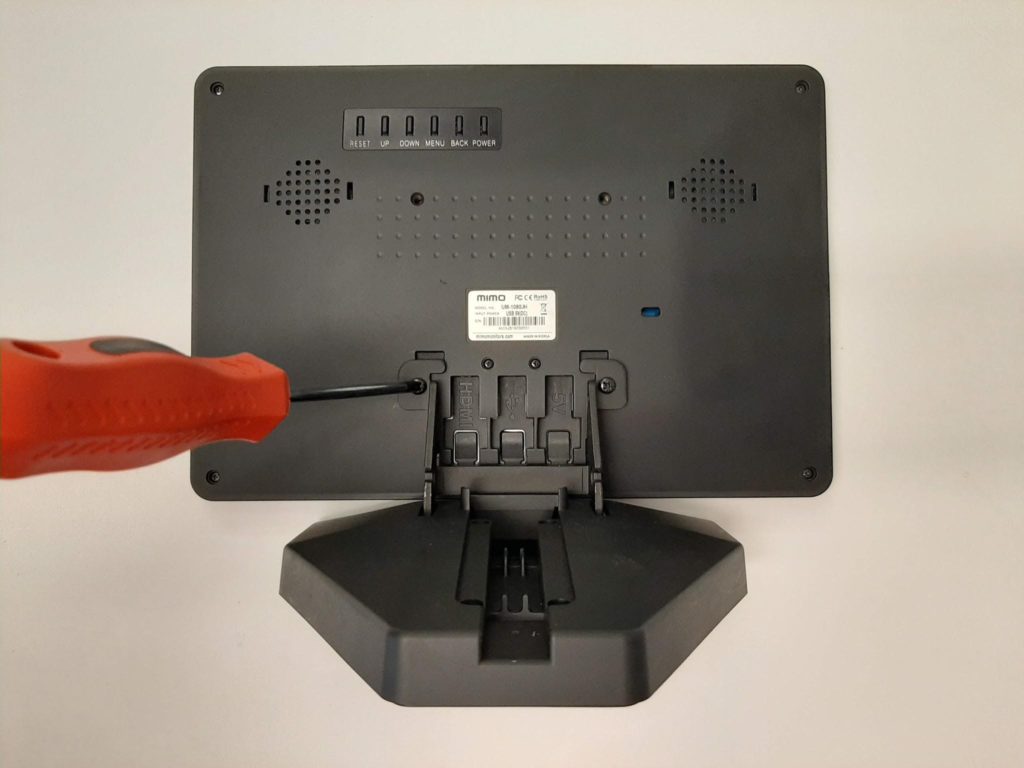
Step 2: Unpack
Place the screen on the stand base. Make sure it is correctly mounted and use the two large screws to secure it.
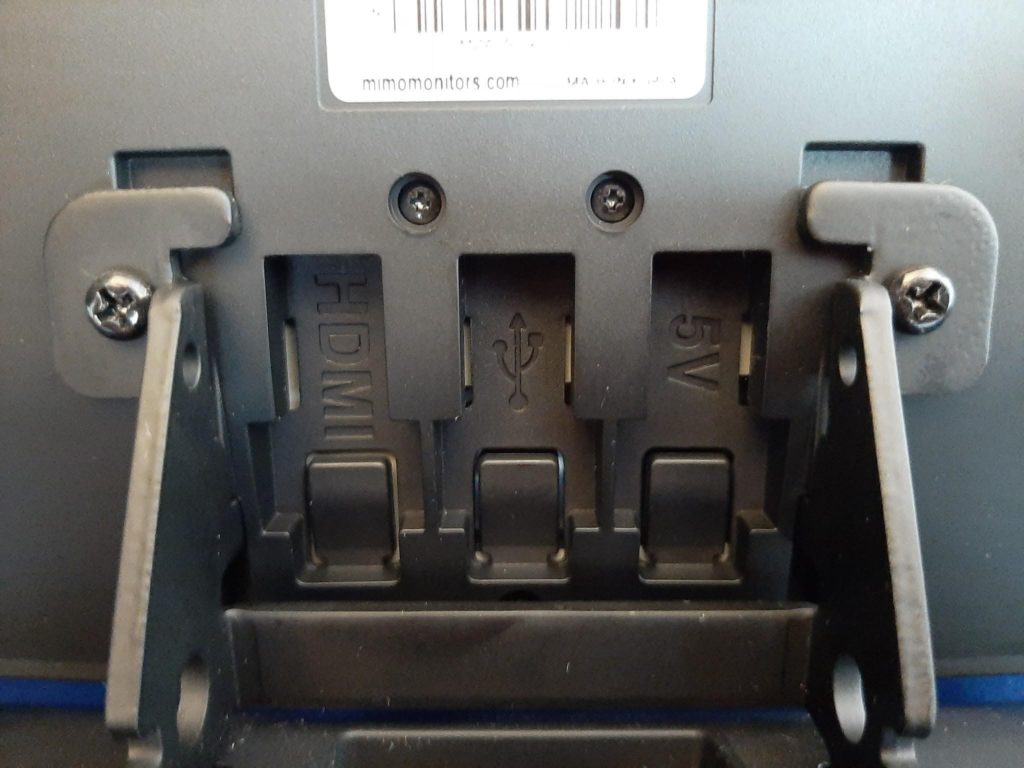
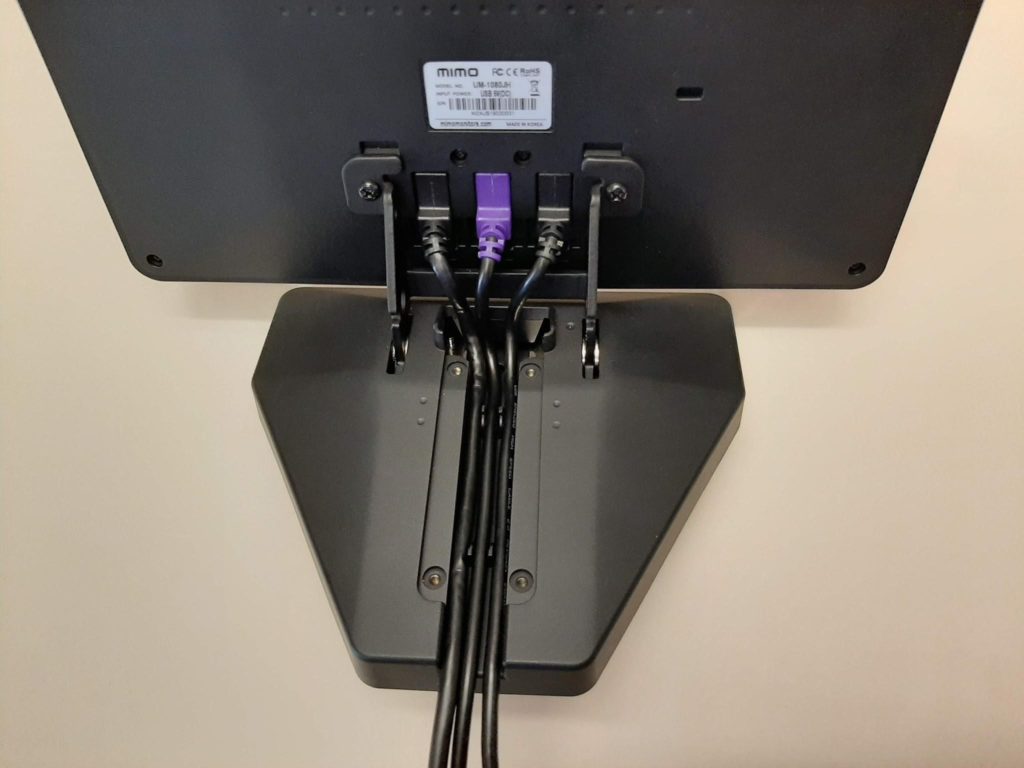
Step 3: Connect the cables
Take a moment to observe the cable connectors in the back of the screen.
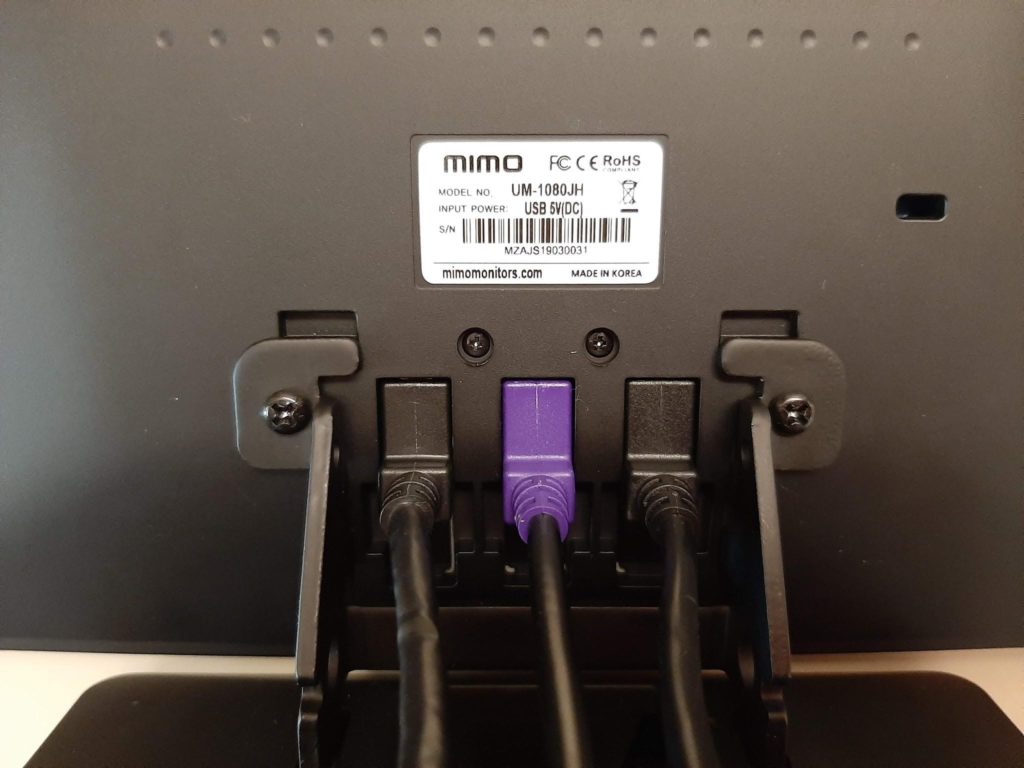
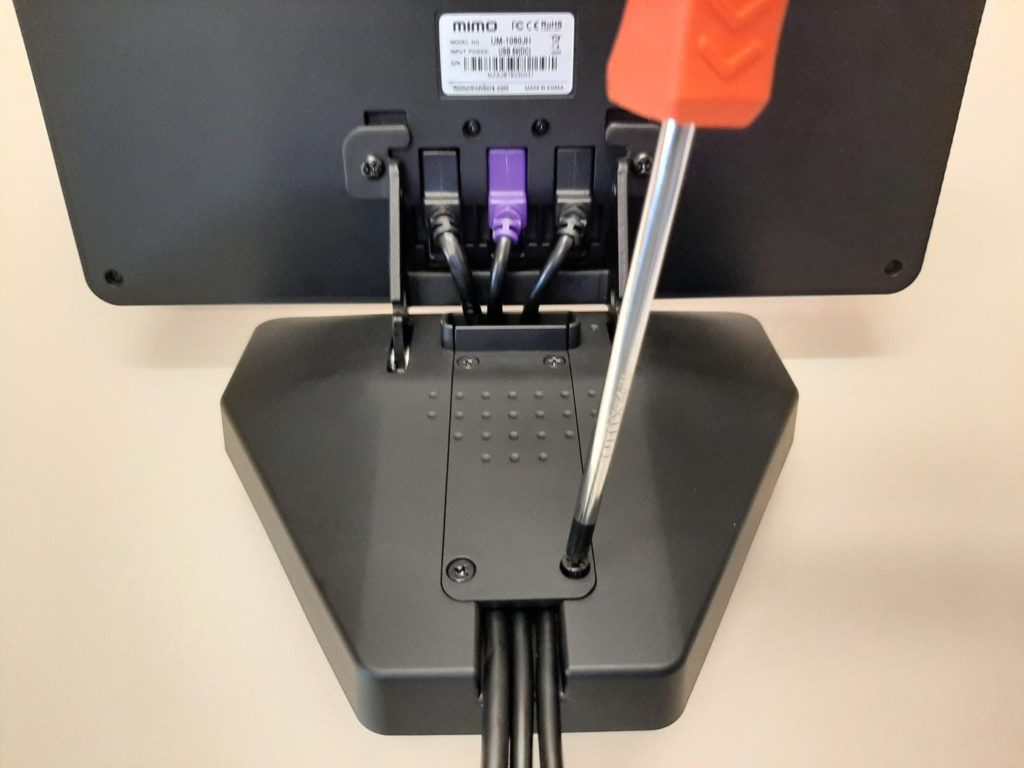
Step 4: Secure the cables
Push down the cables into the stand base.
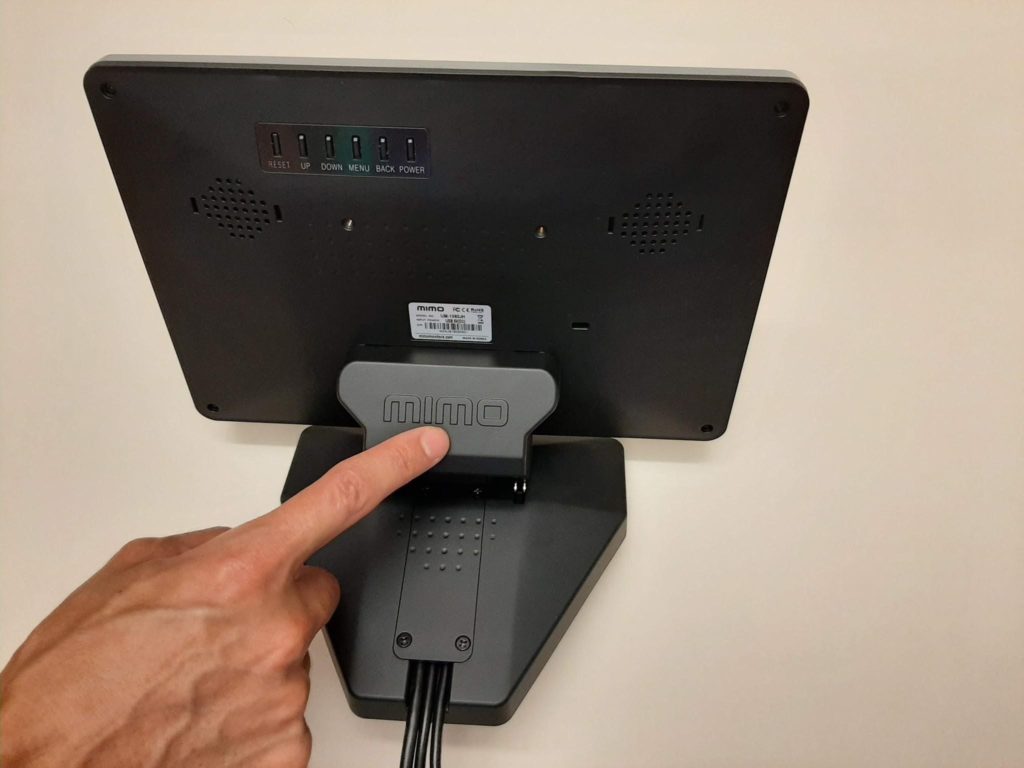
Step 5: Install the cover
Place the back cover over the connectors starting from the top, and pressing down until it clicks.
Step 6: Connect the screen
Connect the HDMI and the purple USB cables to your computer, and the black USB to the included 5V DC adapter. The TanvasTouch screen operates as a normal touchscreen input. Verify that the touchscreen functions by interacting with the operating system via the touchscreen.
Step 7: If your TanvasTouch display is not your only screen
The touch device needs to be associated with the screen:
- Go to Control Panel and search for “Tablet PC Settings”. *(If you do not see this setting you may need to restart your computer with the device plugged in)
- Click “Setup…” to the right of “Configure your pen and touch displays”
- Follow the instructions on screen